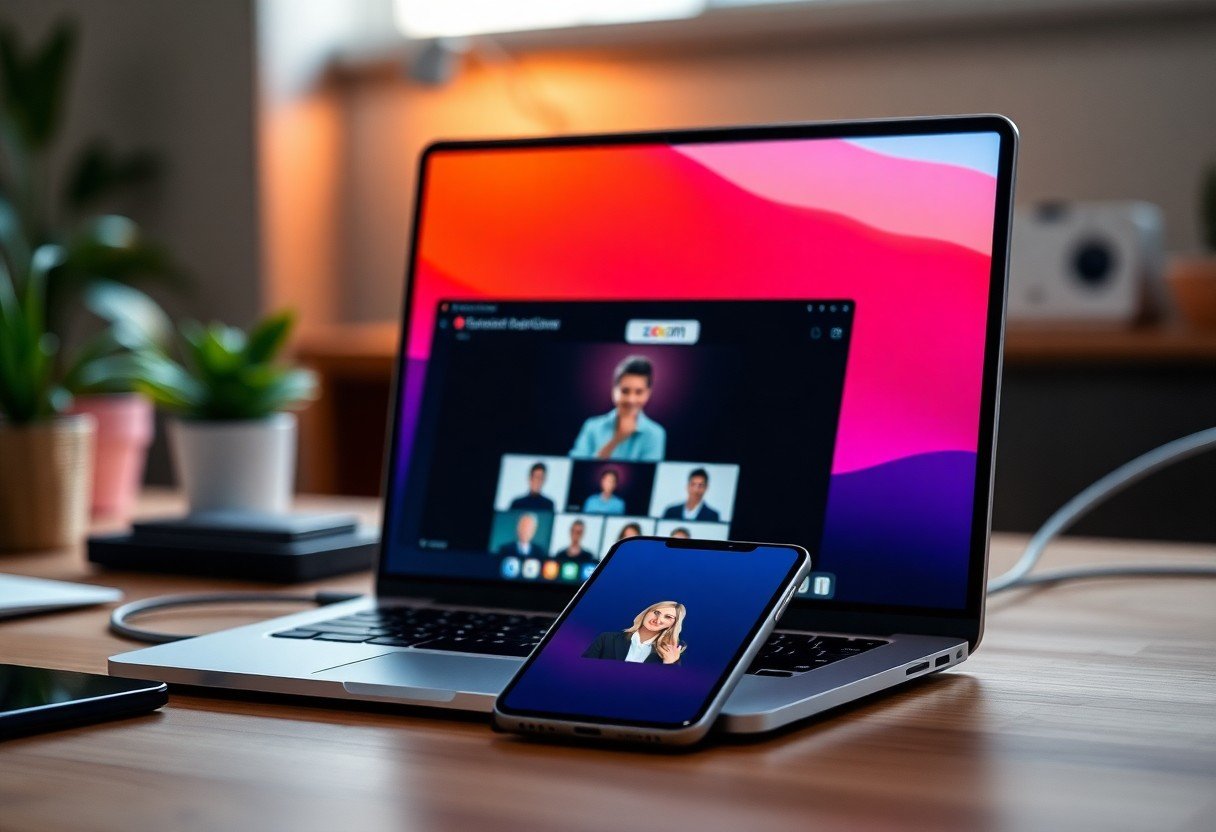
Tired of your Mac’s grainy built-in webcam? You can easily upgrade your Zoom calls by using your iPhone’s superior camera instead. This guide shows you how to connect your iPhone to your Mac, transforming it into a high-quality webcam for a more professional and visually appealing video conferencing experience. The entire process is simple and requires just a few key steps to get started.
Why Use Your iPhone as a Webcam?
Using your iPhone as a webcam for Zoom meetings on your Mac offers a significant upgrade over the standard built-in camera. The advanced camera systems in modern iPhones provide much sharper video, better color accuracy, and superior performance in low-light conditions.
This simple change can dramatically improve how you appear in virtual meetings. A clearer, more professional video feed enhances communication and helps you make a better impression on colleagues and clients. Plus, you get access to powerful features like Portrait Mode on newer models, which can blur your background without relying on Zoom’s software effects.
You also gain flexibility in camera placement. Instead of being stuck with the fixed angle of your Mac’s camera, you can position your iPhone anywhere you like using a small tripod or stand, helping you find the most flattering angle and framing for your calls.
What You Need Before You Start
Getting your setup ready is straightforward, but you will need a few things to ensure a smooth connection. Before diving into the software, make sure you have the right physical tools on hand. This preparation will save you time and prevent interruptions later on.
Most of these items are things you likely already own. The most critical component is the software that bridges the communication between your iPhone and your Mac.
- A Compatible iPhone and Mac: Ensure both devices are updated to relatively recent software versions for best performance.
- A Webcam App: You will need to install an app on both your iPhone and your Mac. Popular and reliable choices include Camo and EpocCam.
- A Connecting Cable: For the most stable connection, use a USB-A or USB-C to Lightning cable to connect your iPhone directly to your Mac.
- A Stand or Tripod (Optional): To keep your iPhone steady and positioned at eye level, a small tripod or stand is highly recommended.
Having a stable stand is more important than you might think. It prevents shaky video and allows you to position the camera at eye level, which is crucial for maintaining natural-seeming eye contact during meetings.
A Step-by-Step Guide to Connect Your iPhone
Once you have all the necessary tools, setting up your iPhone as a webcam is a quick process. The general steps are similar across most third-party webcam apps. Following this sequence will ensure all the software and drivers are installed correctly and that your devices can communicate with each other.
The key is to install the software on both your phone and computer before connecting them. This allows the Mac driver to recognize your iPhone as a camera source as soon as it’s plugged in.
This table breaks down the core installation process into four simple actions.
| Step | Action Required |
| 1 | Choose a webcam app like Camo or EpocCam and download it from the App Store onto your iPhone. |
| 2 | Visit the app’s official website on your Mac to download and install its companion driver software. |
| 3 | Connect your iPhone to your Mac using a USB cable. This provides the most stable and lag-free connection. |
| 4 | Open Zoom, navigate to Settings > Video, and select your iPhone (via the app) from the camera dropdown menu. |
After connecting the cable, your iPhone may ask you to “Trust This Computer.” Be sure to tap “Trust” and enter your passcode to allow the connection. Without this permission, your Mac will not be able to access the iPhone’s camera.
How to Get the Best Video Quality
Connecting your iPhone is just the first step. To truly look your best on Zoom, you need to pay attention to a few details that make a huge difference in video quality. Small adjustments to your environment and camera position can elevate your presence from amateur to professional.
Lighting is arguably the most important factor in video quality. Bad lighting can make even the best camera look grainy and unprofessional. Always prioritize good illumination before you worry about anything else. Position your primary light source in front of you, not behind or directly above you.
Framing your shot correctly is also essential. Position the camera at eye level to create a more direct and engaging connection with other participants. Your head and shoulders should comfortably fill the frame, with a small amount of space above your head. Avoid angles that look up at you or down on you.
Troubleshooting Common Issues
Sometimes, technology doesn’t cooperate. If you run into issues while setting up your iPhone as a webcam, don’t worry. Most problems are easy to fix with a few simple troubleshooting steps. Common issues include the camera not appearing in Zoom, a laggy video feed, or audio being out of sync.
If your iPhone isn’t showing up as a camera option in Zoom, try these steps:
- Restart Everything: Close Zoom and the webcam app on both your Mac and iPhone. Unplug the cable, then restart the apps and plug it back in.
- Check for Updates: Make sure both the webcam app and Zoom are updated to the latest versions.
- Confirm Permissions: On your Mac, go to System Settings > Privacy & Security > Camera and ensure that Zoom and your webcam app have permission to access the camera.
If you experience audio and video sync issues, the problem is often related to your audio input. For the best results, use your Mac or an external microphone for audio input instead of your iPhone’s microphone. In Zoom’s audio settings, make sure your microphone source is set separately from the video source to prevent delays.
Frequently Asked Questions about Using an iPhone as a Webcam
Can I use my iPhone as a webcam for Zoom without an app?
With newer versions of macOS (Ventura and later) and iOS (16 and later), Apple’s built-in Continuity Camera feature allows you to use your iPhone as a webcam wirelessly without any third-party apps. However, for older systems or for more advanced controls, apps like Camo or EpocCam are necessary.
Is a wired USB connection better than Wi-Fi?
Yes, a wired USB connection is almost always better. It provides a more stable, lag-free video stream and has the added benefit of charging your iPhone during the call. A Wi-Fi connection offers more flexibility but is prone to lag and will drain your phone’s battery much faster.
Will using my iPhone as a webcam make it overheat?
Your iPhone may become warm during long video calls, especially if you are using a Wi-Fi connection and charging it at the same time. This is generally normal, but if it gets excessively hot, ensure you close other apps running in the background and consider using a wired connection, which is often more efficient.
What happens if I get a phone call while using my iPhone as a webcam?
If you receive a phone call or notification, it will likely interrupt your video feed in Zoom. To avoid this, you can put your iPhone into “Do Not Disturb” or “Focus” mode before you start your meeting. This will silence notifications and prevent calls from disrupting your video.
Can I use the front and back cameras of my iPhone?
Yes, most webcam apps allow you to switch between the front-facing and rear-facing cameras on your iPhone. The rear camera system almost always offers significantly higher quality, so it is the recommended choice for the most professional look.


Leave a Comment